A Quick Backpack on Kinder

DSC00321

My first backpack of the year was the last weekend in March.  I had been watching the weather forecast for this week and it looked like it was going to be a cracker. Beautiful spring weather but cold at night. The sort of weekend that doesn’t came around that often in the UK and one you need to grab with both hands.

I learnt that Chrissie and James would be on a two night backpack in the same sort of area too, so I contacted them and said that I hoped we could meet up on the second night if our paths crossed.

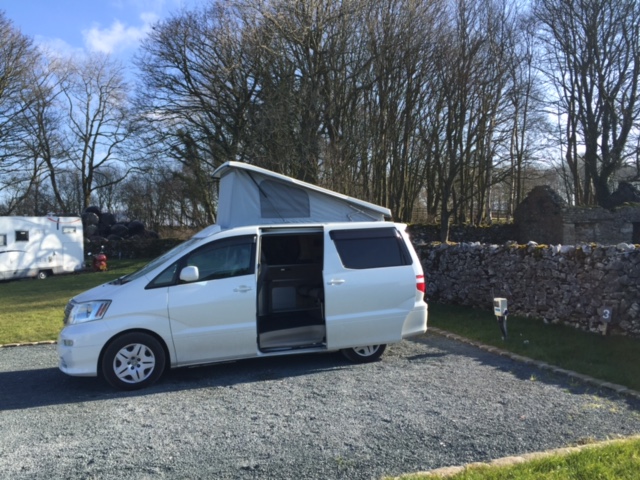
For the first night I stayed in the campervan at a small certificated site near to Hayfield in relative luxury but it was a very cold night, minus 5C by dawn. I did however put the van heater on a few times which took the chill off the air.

FullSizeRender

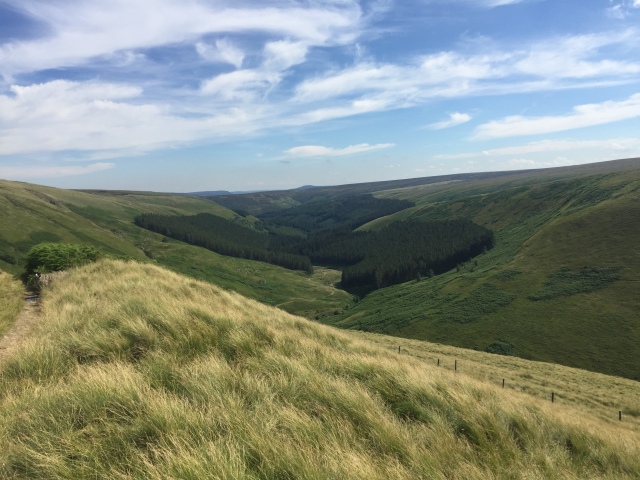
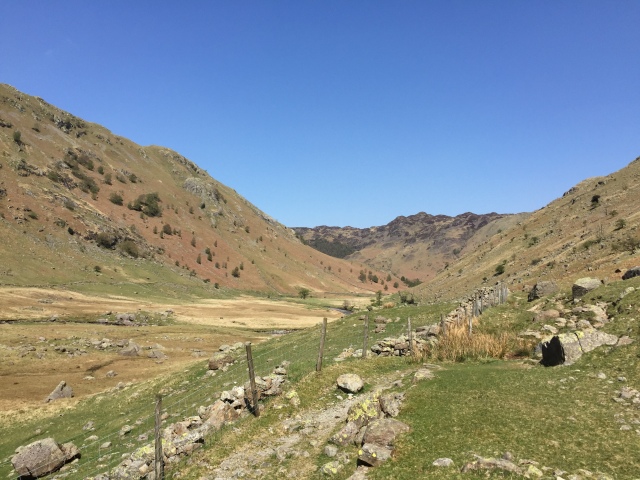
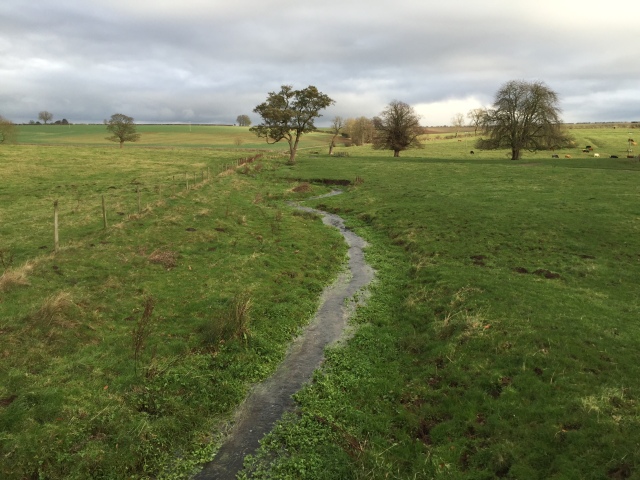
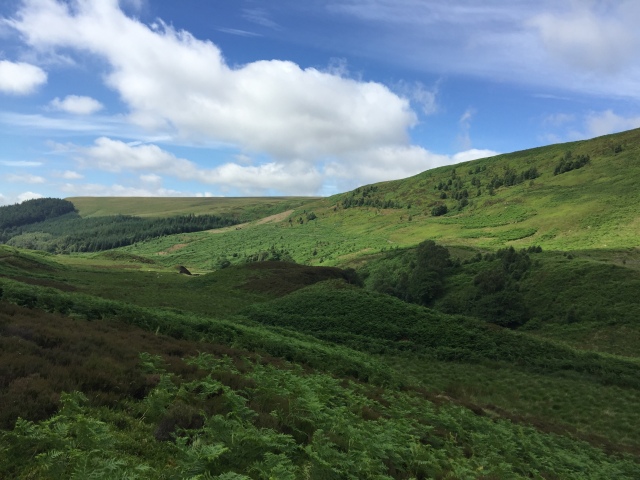
The morning was quite beautiful and after a number of cups of tea and breakfast I shouldered my pack, locked the van and set off along the nearby Sett Valley trail towards Edale Cross.

IMG_5811

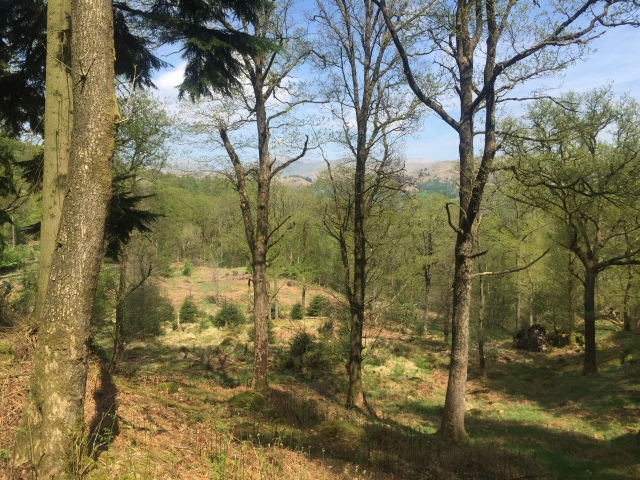
Pleasant start to the walk along the Sett Valley trail

DSC00319

IMG_5813

The first stretch was very easy going but after a few miles I started to climb towards Edale Cross. Despite having no more than 8.5 kgs on my back, pack included, my fitness levels were pretty poor and I went uphill at a snail’s pace only compensated by the fine scenery and beautiful weather.

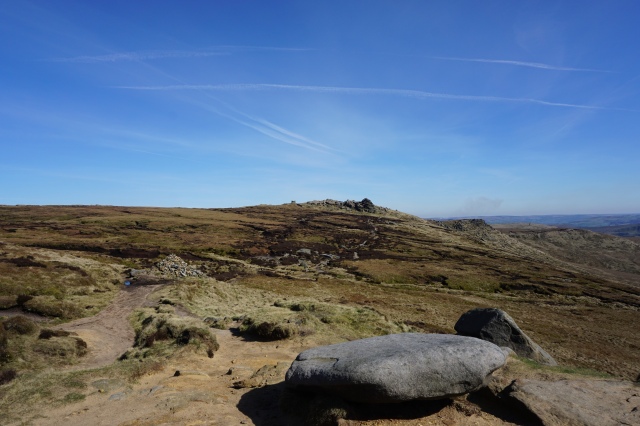
Once I reached the plateau itself, it was much easier going as by and large it’s pretty level ground. I hadn’t been up on Kinder for quite a while and I had forgotten how crowded the poplar parts can be, especially around the top of Jacob’s ladder.  Don’t get me wrong  I’m no wilderness snob – can’t walk anywhere where there are crowds and in this day and age where so much is written and reported about chronic levels of obesity and that 20 million people don’t do enough exercise it is great to see people getting that exercise and clearly enjoying the scenery and weather.

Lunch was taken at the Pym and good views were guaranteed by the fine weather.

DSC00321

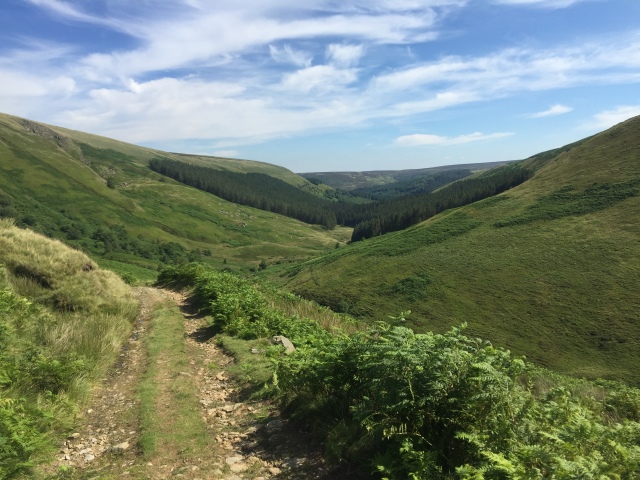
Afterwards I made my way past Crowden Tower, crossed Crowden Brook and onto the Edge footpath. By now the crowds had thinned right out and by the time I reached Ringing Roger there was no-one about.  I paused here and phoned Chrissie to find out where she and James were. They had just crossed Snake Road and were walking towards Jaggers Clough. Fortunately both James and I were tracking on Social Hiking so it was easy to find out where they were. We said that we would look to camp somewhere near to Mad Woman’s Stones. I made my way towards there, I now had my second wind and was shooting along but  I could see on Social Hiking that James and Chrissie had been stopped for a while. I dropped back down to the Edge path, found some peaty water from  a stream and made my way to Crookstone Knoll.

Right in the distance by a lonely tree on the side of the track coming from Jaggers Clough I spied two orange blobs about a mile or so away.  Another quick call to confirm that the identity of the two orange blobs were Chrissie and James, the orange from the two jackets they  were wearing.  I made my way down to meet them as they were coming up with the two dogs in tow. After brief hello and I haven’t seen you in ages we plodded up the hill.  By now James & Chrissie were pretty tired. Their packs were considerably  heavier than mine on the account of the extra weight one has to carry when backpacking with dogs.  Finding water was the order of the day. I already had mine and it was decided to find a suitable camp spot and then go back down to the steam where I had located water earlier after pitching up.

Quite a lot of the area was covered in heather, but James spied a suitable spot a 100 feet or so off the path where there was some grass. Enough suitable spots were found for three tents, they were soon up and I started dinner while Chrissie and James went back down to get water.  By now the sun had pretty well set and it was becoming distinctly chilly, so I donned a few more layers while I waited for the water to boil for tea and Spag Bol.

img_5816.jpg

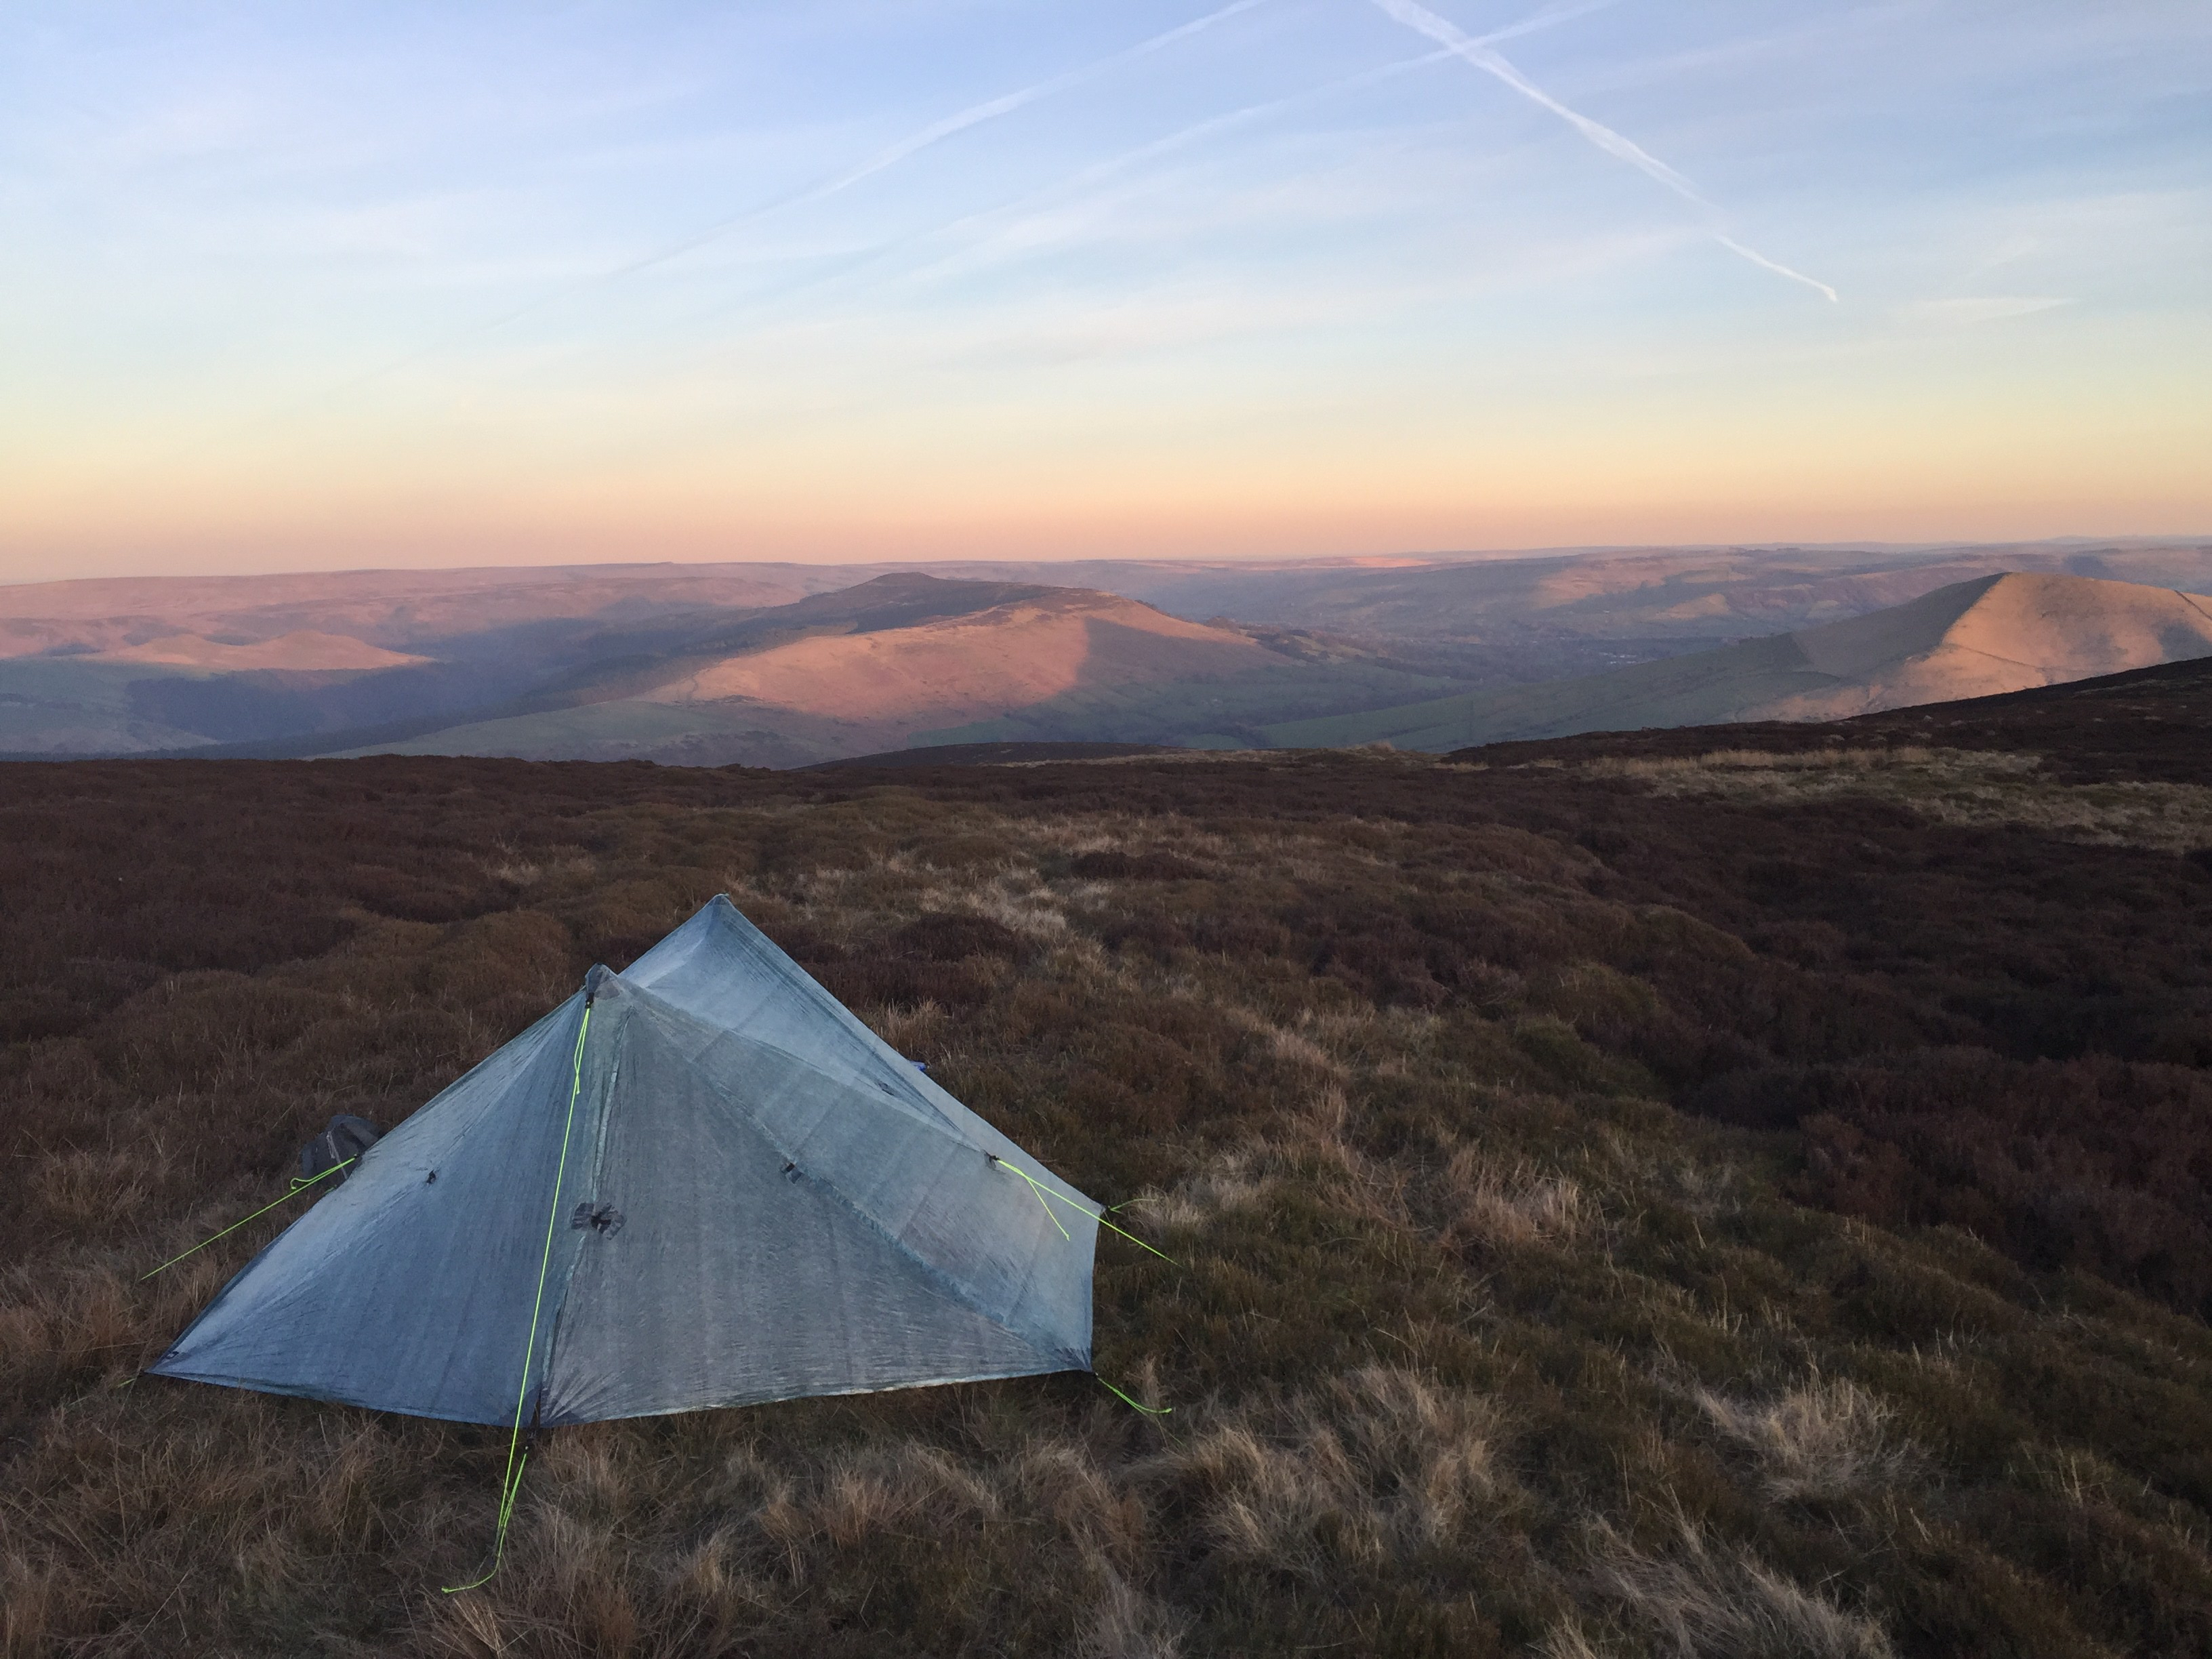
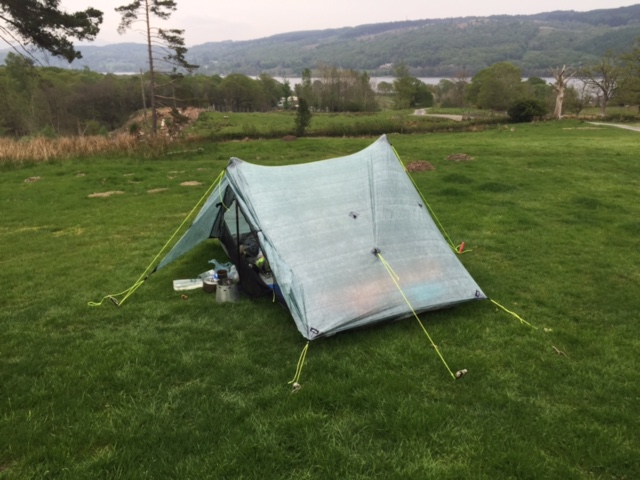
A picture perfect pitch.

IMG_0724

Two photos nicked from James’ Twitter feed (1)

IMG_0725

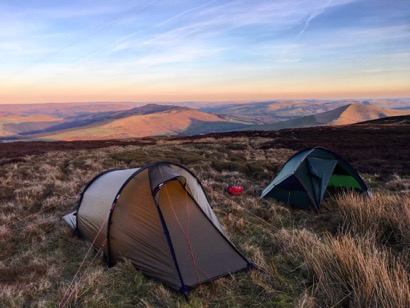
James and Chrissie set up for the night (2)

After dinner, I joined James and Chrissie while they prepared and ate theirs. Time to catch up, compare notes  and view the wonderful starry night sky. The cold night drove me back into my tent and I let them know that I would be leaving early in the morning as I needed to get back home by Sunday afternoon.

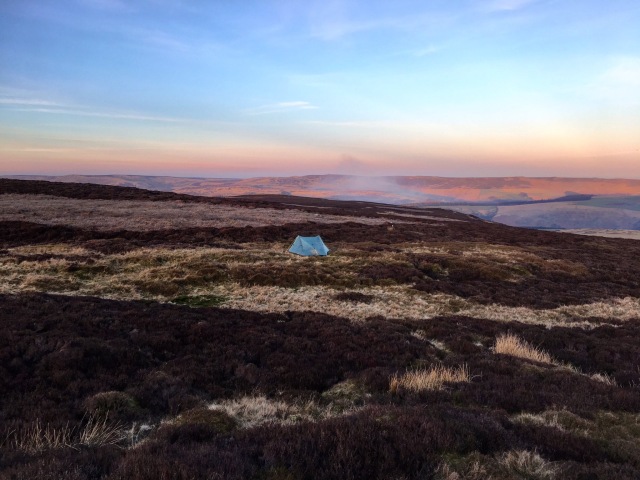
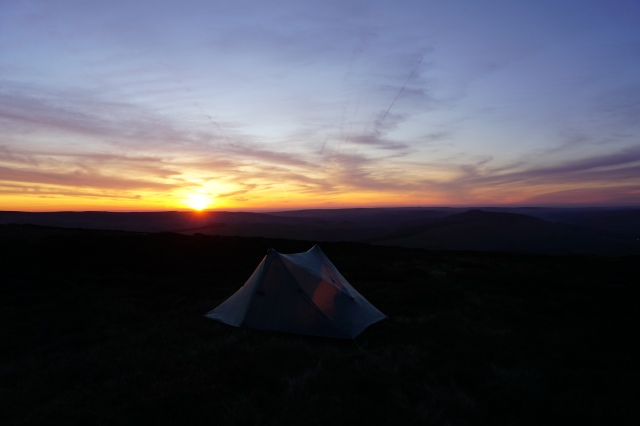
After a decent enough night’s sleep only punctuated by the sound of grouse and a flock of geese flying over the tent at 3 in the morning I awoke just as dawn was breaking at around 6.15.

As I had my morning cuppa I was treated to a beautiful sunrise, a sunrise which makes getting outdoors a pleasure.

DSC00330

DSC00332I was packed up and ready to go just as James and Chrissie were rising, I said my brief goodbyes and promised that we would try to do this again sometime.  I retraced my steps down to the ford and then along the Edge path to Ringing Roger to descend to Edale via the Nab.

IMG_5820

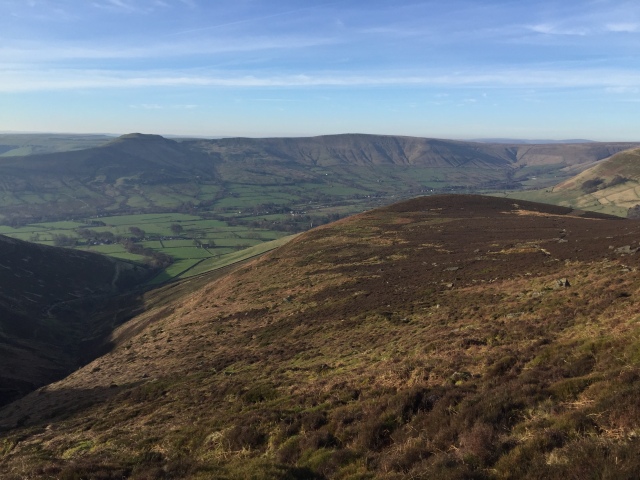
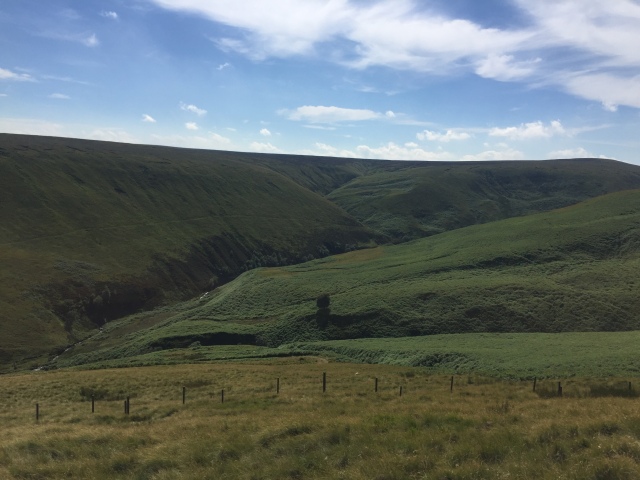
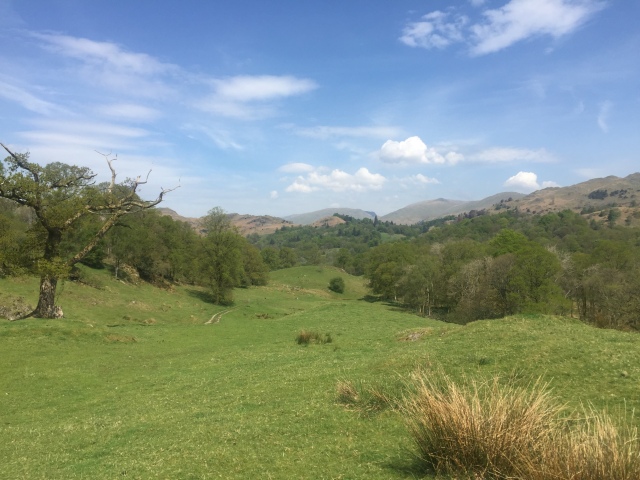
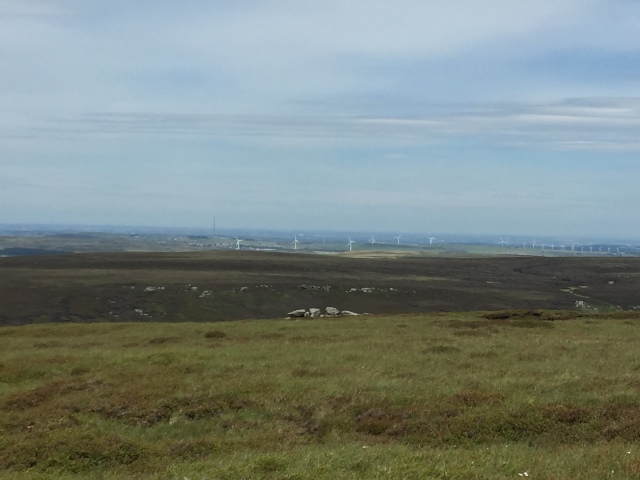
Looking down at Hope Valley

IMG_5821

Looking over to Grindsbrook Clough on the descent to Hope Valley and Edale

Soon the familiar sight of Edale loomed up and I walked down to the railway station and waited for the train to take me two stops to New Mills. A large cooked breakfast was taken at a cafe near the Sett valley trail and I retraced my steps back to my waiting camper van.  A great start to my backpacking season.

Posted in trip reports | Tagged , , , , , , | 8 Comments

Long term review of the Hi-Tec Trek Plus

img_4965It’s a year since I was contacted by Hi-Tec to review their activity tracker or fitness band as they are often called. I must admit to be guilty of not writing this one up with the excuse that work & life got in the way.  However, this has given me a year to test the product and I’m glad I did as so far this has been the longest lasting fitness tracker that anyone in our family has had without breaking or going wrong and I include 3 different Fitbit models and two UP24’s. Although I treated myself to an Apple watch about 5 months which is truly excellent, but about four times the price of what you can get the Hi-Tec Trek Plus for, I still wear it everyday and it has never been a problem.

The basics

The Trek Plus is an activity tracker which is attached to a rubber type strap. The unit will come out of the strap, if pulled sharply. I only found this out after wearing it for months when  I banged  it very hard going the a door in a hotel and it popped out on one side, so I guess the strap can be replaced, which I couldn’t do with other fitness trackers, except the Apple watch.

It will track your daily steps and will notify you when your chosen steps are reached, mine is 10,000. Swiping the unit will also give you distance and calories burnt. The step counting seems to be accurate and as a test when I first got the product to try, I verified  this on a treadmill in the gym and it counted every stride.

It will tell the time, give you notification of emails, phone calls on your  iPhone, text and tweets. I don’t use all these features as the things would be going off all the time if you were to include all of these.

You can also measure your heart rate and it will periodically also record your heart rate at random times. There is a very simple sleep function which just records manually how long you have been asleep but I have never use that as I’m not bothered. Music from your phone can also be controlled from it as well.

The product syncs via bluetooth with your iPhone and iPad  and will work with IOS 7.1  and above and also Android 4.3 and newer.

With Apple products – iPhone 4S and newer, iPad 3rd generation and newer, iPod Touch 5 and newer.

With Android – HTC One M7 and newer, Samsung Galaxy S3, Galaxy Note 3 and newer, Google Nexus 4 and newer and Motorola Moto X and newer.

In Use

Below is a quick video of the basic features of the Trek Plus and I have also include a screen shot from the app which you download from The App store or Google play to give you and indication of what it can record. In this case the Chart & Stats for steps taken.


img_0371

Number of steps are recorded for each day and you can look back over the weeks and months since starting to use the product.

I found after a bit of experimenting and use, the Trek Plus was easy to use and work out the functions. Being able to know distance and steps walked while out and about was a distinct advantage from the Up 24 which has no screen and you had to sync with your phone or tablet to find out how far you had travelled.

Hi-Tec claims five days worth of battery life but I have never got more than 2 days.  To charge the Trek Plus you attach it to a little charging cradle with has a USB on one end and  plug it into the mains.

img_4966

Charging cradle for the Trek Plus

Annoyingly, it will not charge with any of the battery chargers I have, just seems to shut off and not charge. I can however charge it with the 12V system I have in my campervan.

This lack of charging from 12V battery chargers means that anything longer than two days away wild camping is no good. My Apple watch seems to have no problem, so I now leave the Tek Plus at home when wild camping for longer  than an overnight.

For the price this is an excellent fitness tracker, that works well and priced at around £70 is well worth consideration if you are looking for one.


Posted in Gear | Tagged , , , , , | 1 Comment

Howden Moors and Barrow Stones

IMG_0340

Barrow Stones

This was a day walk back in mid July after an overnight in the camper van. I arrived early to park at one of the free car parks south of the main pay & display at Fairholmes at the far end of Ladybower Reservoir.  I crossed in front of the Upper Derwent Dam to reach the east side of the Reservoir.

IMG_4745

Upper Derwent dam

A long but pleasant enough walk along side the Upper Derwent and Howden Reservoirs followed, before reaching the ford near to Slippery Stones.

IMG_4747

Howden reservoir

Leaving the reservoir area to follow the River Derwent upstream I was alone for a large part of the rest of the route.

IMG_4749

IMG_4750

The sun was pretty strong and it was sweaty climb along tracks that by the looks of it had seen very little traffic, pushing through chest high bracken for part of the way. I back tracked a couple of times as the bracken had completely disguised the path I was trying to follow. Eventually I climbed up onto Featherbed Moss with extensive views to the North but spoilt by wind turbines, their ugly presence having no place near to a National Park.

IMG_4754

A good view spoilt

Lunch followed, taken on a rocky outcrop on route to Bleaklow Stones.

IMG_4752

Lunch stop

At the point where the path turns sharply south, I cut across the moors to Barrow Stones. Finding along the way a small spring, the water being crystal clear and was so unusual compared to the tea coloured peaty water that one normally has to take, I made a note of the grid reference for future walks in the area.

IMG_4755

Barrow Stones

IMG_0340IMG_4756
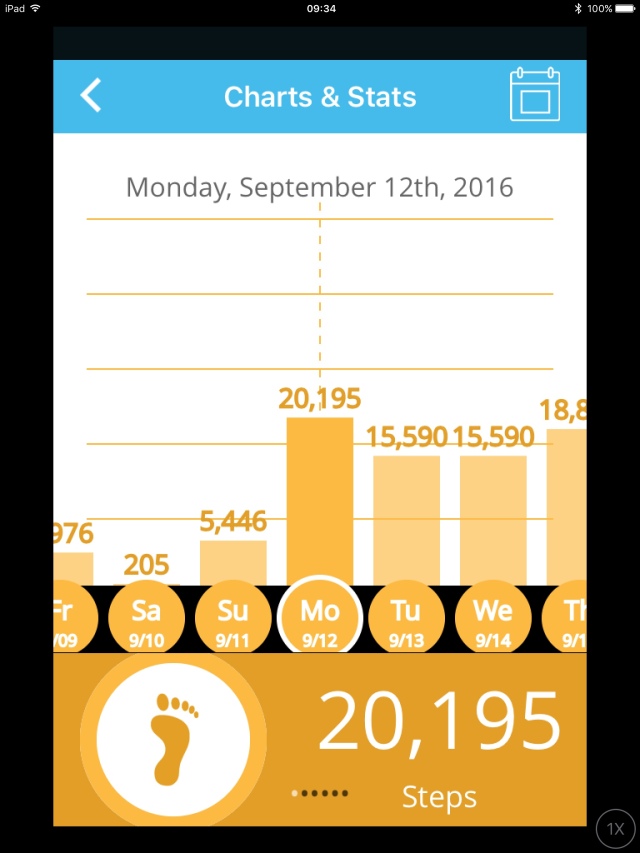
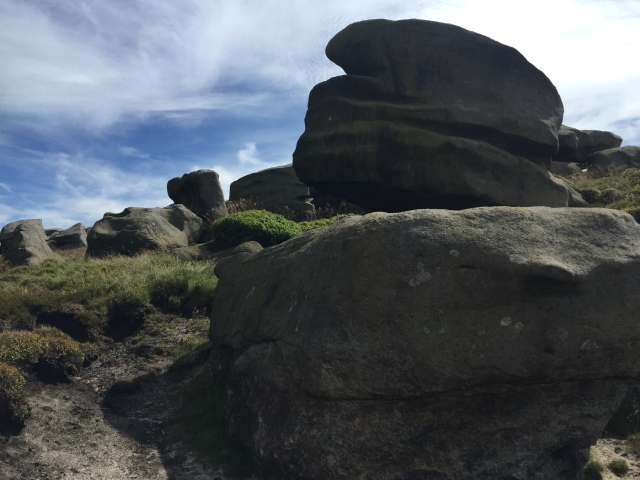
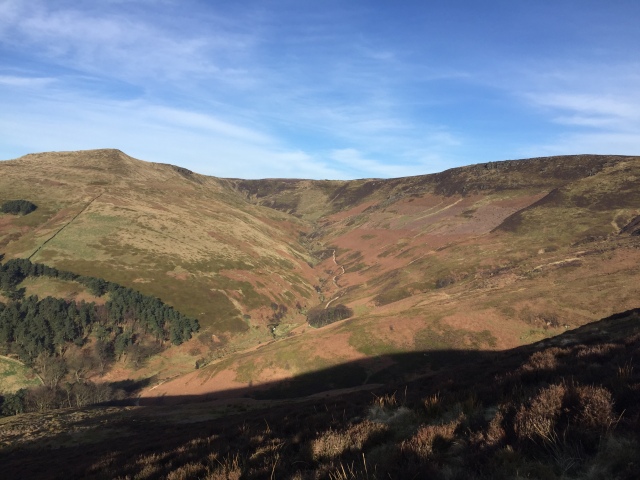
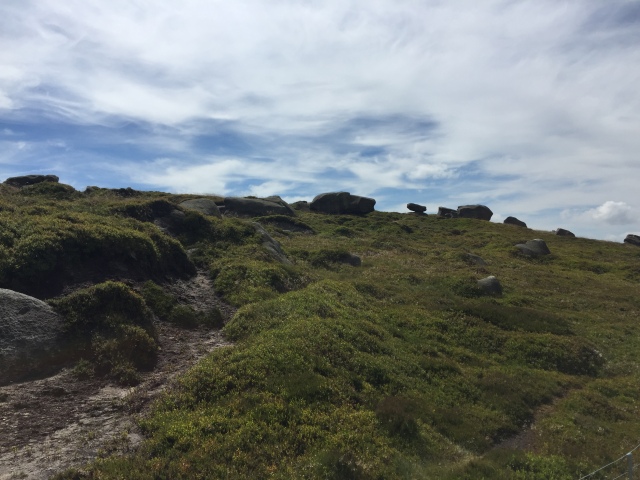
Clambering around the strange shapes of the Barrow Stones I took a path heading roughly  south-east towards Round Hill and then near to the Shooting cabins. IMG_4759I eventually picked up a track through a steeply sided valley and down through a lovely wooded area reaching the road close to the bottom of Howden Reservoir. Walking on the opposite side to my outward journey I arrived back at the camper van in the late afternoon. IMG_4760IMG_4761IMG_4762

IMG_4765

Stats for the day


Posted in trip reports | Tagged , , , , , | 7 Comments

Rosthwaite to Coniston

I’ve not really been paying attention to my blog of late and I’m now playing catch up.

This trip goes back to May and follows on from a long weekend with Mary and Meg our Labrador pup in our campervan staying outside Keswick at a campsite at the foot of Blencathra.

Mary dropped me at Rosthwaite, and I walked from there mainly following the Cumbria Way, through Langstrath Valley, over Stake Pass, camping at Great Langdale and moving on the next day, to arrive in the evening above Coniston Water near Torver. Although warm and sunny, it was accompanied by strong winds, the forecast suggesting 55-60 mph winds on the tops, which meant I sought the shelter of valley camps during the trip.  Quite a few miles were walked through wooded sections and this made a pleasant change from  walking on the fells.

It was my first chance on a backpacking trip to try out my Zpack Duplex tent which performed well and has bags of space for one, being a two person shelter but only weighing 600g.  Other notable pieces of kit where my Enlightened Equipment Revelations Down Quilt and 2015 model of the GG Mariposa which carries like a dream.

Below are some photos of the trip.


IMG_4355

On the Cumbria Way at Rosthwaite at start of trip.

IMG_4362

Langstrath Valley

IMG_4369

A lonely tree

IMG_4374

Just below the top of Stake Pass, looking down to the upper part of Langdale.

IMG_4377

Pike of Stickle

IMG_4380

Green and pleasant Langdale

IMG_4382

Late spring lambs

IMG_4388.jpg

Good to see trees as well when out walking

IMG_4389

IMG_4390

Lunch stop

IMG_4391IMG_4392

IMG_4401

Bluebells in Tarn Howe Woods

IMG_4403

IMG_4406

Coniston Water

Duplex

Above Coniston Water in Zpacks Duplex

IMG_4414

Sunset over Coniston fells

Posted in trip reports | Tagged , , , , | 9 Comments

Review of 2016 ZPacks Duplex Tent

Duplex

Made of Cuben fibre and weighing just under 700g (1.5lbs), excluding pegs for a true two person shelter, the Duplex has to been one of the lightest if not the lightest on the market.  Whilst not cheap, if you value quality design and manufacture, lightweight, strength and space, then this may be the shelter for you. For a chap in his fifties, who needs to carry less weight, this provides a significant decrease in weight over other shelters I own without sacrificing comfort. The shelter comes with Cuben fibre stuff sack but pegs are not included. I use a combination of blue and black Easton pegs with the Duplex.

I  have made a short video review, which show the attributes of this shelter.

Details of the Duplex tent can be found here

Will Wood’s Set up video here

You will see some un-used attachment tabs on the shelter in my video which are there to allow a free standing arrangment – seen here I don’t have this system.


Posted in Gear | Tagged , , , , , , | 3 Comments

A short trip around Ingleborough

ingle7

I have found more and more that work gets in the way of weekend trips. The time I finish often late on a Friday I’m often too knackered to go away for the weekend, particularly in the winter period when arriving at a destination long after dark is not ideal. This coupled with the seemingly endless bad weather that this winter has produced and I find myself having done very little for months.

Mary used to come walking with me a lot when we were younger but since a bad accident a number of years ago, she cannot easily climb mountains. She walks fine on the flat but finds steeper inclines a struggle.

Back in late January we took delivery of a campervan, which means that in the future those winter trips will be easier.  It also allows us to share time in the outdoors together.

I’m still going to do backpacking trips, but this gives me other choices as well.

Back in September, after a strenuous backpack trip in the Lakes I hurt my knees quite bad on scree slopes and it has taken awhile to get back into my stride so to speak. My plan was to go off on my own, taking the campervan for an overnight and then do some walking around the limestone pavement country near to Ingleborough. This was to make sure that everything was OK with me before getting back into backpacking once the really busy period at work is over.

Here are some photos of my walk, which I was pleased to say went well with no aches and pains and enjoyed in fine weather and great scenery!

ingle1

My campervan at a small site near to Austwick

ingle2

Nice views from the camper while having my early morning tea.

ingle4

The early spring colour of Lesser Celadine

ingle3

Fantastic little foot bridge out of Austwick

ingle5

Looking to Norber

ingle6

Entrance to Ingleborough Cave

ingle7

Start of Limestone pavement around Sulber

ingle10

A solidarity tree in the landscape

Ingle8

Close up of clinks and grikes

ingle9

Looking towards Pen-y-ghent

Posted in General | 14 Comments

Extending the season for Treking sandals

My introduction to the use of Treking sandals for backpacking and walking in the mountains was after  watching Chris Townsend use them ploughing through the mud and bogs of the Central fells when I accompanied him and Terry Abraham on our  June trip in 2014 where Terry and Chris made their backpacking DVD. The weather was very warm and they were ideal footwear, no issues with Goretex lined shoes or boots being soaked and remaining wet.  They dried rapidly and Chris said they were very comfortable to wear.

I have been a convert to unlined trail shoes for awhile and really do not like the restrictions of boots, outside the dead of winter. I didn’t get any treking sandals until this year and decided on an open – toe  sandals so any debris would be easy to get out. I purchased a pair of Teva Fi 4’s  which had really good reviews. There is no problem with stubbing your toes as the ends of the sandals are up-turned.

They are very comfortable to wear, no problems about fording streams, having to take socks off or change shoes, or boots and they dry rapidly. With 3 straps, you can get the fit very precise, much more so than trail shoes or boots.

I had no problem with using them in steep rocky conditions, and wore them very successfully when hiking in Sierra Mountains in California this June.

IMG_0487

Rather dusty and dirty feet after a day’s walking in Lassen Volcanic Park

Other trips back in the UK convinced me that these were the ideal footwear, particularly during  backpack  trips. Everything was great until the weather started to get colder and my toes started to get chilly. Back to trail shoes and boots or was there another way? I had read about using neoprene socks typically for kayaking and found that Joe Valesco  owner  of Z-packs had used neoprene and sandals on the 2014  TGO challenge.

I found some NSR Hydroskins which are 0.5 mm thick. The great thing about neoprene is whilst they won’t stop your feet getting wet  your feet should remain warm, or that is what I have read. I also wear a pair of  Treking Expedition socks from X socks.   I have used these mainly synthetic socks with some merino wool in unlined trial shoes and they dry more quickly than wool, which leads to less possibilities of blisters.

The fit of both the  X socks inside the NSR Hydroskins is good and comfortable.

IMG_1514

NSR Hydroskins (top) and Treking Expedition socks from X socks ( bottom)

I have used combination over the last two weeks for local walks lasting up to two hours. This period has been very wet. The route is extremely muddy  goes through marshy areas with one stream crossing and many puddles.

The temperature yesterday was around 2C and the weather was sleet and rain. Whilst my feet were wet, they were not cold and walking the dry sections it soon felt that my feet were getting drier.

IMG_1515 (2)

Showing neoprene socks with Teva sandals in very wet and muddy conditions

So far so good, my next test is a short back pack in them, to test the suitability. This will include foot care procedure. I will take two pairs of X socks and one pair of warm merino wool socks to change into as soon as I am in the tent. Keeping your feet warm and dry overnight is essential to avoid foot problems. On an extended back pack, it will be important to wash out the socks and Hydroskins.  I will report back further my experiences as they occur.


Posted in Gear | Tagged , | 5 Comments

Back in my stride

goulceby9

Within 10 minutes walk from home. I can take this footpath from my door

My last trip to the Lake District, resulting in injury to both my left knee and right foot. I rather overdid it and it didn’t help going down near vertical scree slopes on Great Gable. The next day after wild camping on Kirk Fell I descended a path just as steep which was hopelessly in need of repair. It has taken quite a long while to get back into my stride. I have been doing some short walks from the house and trying to build up steps as much as possible, but whilst it is better than when I hobbled into Buttermere on the 4th day of that trip, I still have some discomfort.

I have resisted getting back in the mountains, trying to build up some strength in my knees and foot, the longest distance so far about 3 miles.

I live in the Lincolnshire Wolds, a range of low hills reaching the dizzy heights of 550 feet and I can walk straight from my door. So nothing too steep or difficult and being an Area of Outstanding Natural Beauty, a pleasant area to roam.

Today I walked around 9-10 miles mainly on the Viking Way, a long distance trail, taking the precaution to tape up my right foot with Rock Tape for some support.

Here are some photos of my walkgoulceby10

goulceby11

goulceby12

This is a lovely little chalk stream at Biscathorpe, the next valley over to my home. It is crystal clear.

goulceby4

Here is the stream a bit further on.

goulceby5

Here is a bit about what has been done to restore the chalk streams in the area.

goulceby2

Biscathorpe Church

goulceby6

Oxford Sandy & Black rare breed pigs near Donington -on- Bain

goulceby7

Course of the old railway that ran from Louth in the north to Bardney in the south. It closed in 1960, there was a station in my village on this line.

goulceby1

The old graveyard at the old All Saints Church at Goulceby. The remains of the church is somewhere in amongst this.

goulceby8

The new All Saints at Goulceby, journeys end

Posted in trip reports | Tagged , , , , | 6 Comments

Custom gear comparison table

I got a DM on my Twitter account  today from a fellow backpacker and wild camper asking if I had carried out a comparison of WM Summerlite, and the Panyam 600 and Teneqa 700 sleeping bags  from Cumulus.I hadn’t got to those bags yet, but it didn’t take too long  to compile the table and for ease of communicating the information I have posted it up on my blog. The WM Summerlite is a favorite 3 season bag and the other two are good value, well spec-ed bags for the winter.

Comparison here:sleeping bag comp. P D v1.1

Gear comparison tables update : I am currently working my way through UL shelters at the moment, but I have plans for winter sleeping bags and quilts and others after that. I will post up as soon as I can!

Posted in Gear | Tagged , , , | Leave a comment

Gear Comparison Tables

Lake District june 2104 074

Back in 2011, I started to put together a few  gear comparison tables  in a systematic way to help me select the right gear to lighten my base weight.  Work and at the time my wife’s illness meant that for a while I was unable to do many trips and therefore I didn’t utilise the results of my work. My comparison tables sat on my computer forgotten for 4 years, until earlier this year and then about a month ago I decided to complete the first one by updating the old table, adding new products and deleting old ones. The first table published is UL sleeping bags and quilts weighing 500g (lbs) or less I have create a separate page on my blog – Gear comparison tables (see main menu). I have gone for this route as I feel the seasons ratings don’t always take into the account the way bags and quilts are now used particularly adding of down jackets and trousers and other clothing to extend the temperature range and as people also say they are warm or cold sleepers, the easiest way to split up the categories was by weight.

I have included all the available sleeping bags and quilts that I have been able to research in this category and I hope the reader finds this useful. I have added links to websites, the cheapest price I can find where the manufacturer is not selling direct and have added links to up to 3 reviews including video reviews where I can find them. If readers see any missing models or reviews  or any glaring errors! then please let me know. There are other comparisons out there, notably Philip Werner’s excellent Gear Navigator at his site Section – Hiker.

The next table of sleeping bags and quilts will look at 500-750g (1-1.5 lbs).

I am working on other gear comparison tables to be published as soon as I can finished them!

The 1st chart link is below, please click on link to take you to it.

UL Sleeping bags & Quilts 500g (1 lb) or less table

Posted in Gear | Tagged , , , | 2 Comments